Home - Information Services - Get Help - How-to-Guides - WebAdvisor - Time Entry Directions for Students
Time Entry Directions for Students
To access Time Entry through WebAdvisor, follow the steps below. (For assistance, please contact the Personnel Office at x2122.)- Go to the MC home page (http://www.monmouthcollege.edu).
- Select MyMC.
- If prompted, log in to the Forefront Threat
Management Gateway page with your MC user name and password.
Otherwise, proceed to the next step.

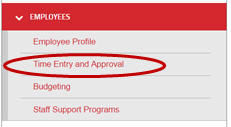
- Under Self-Service (WebAdvisor), select
EMPLOYEES.

- Select Time Entry and Approval.
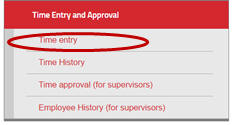
- Select Time entry.
- Select the appropriate timesheet for the position and pay period
by selecting its checkbox in the Choose Only One column.
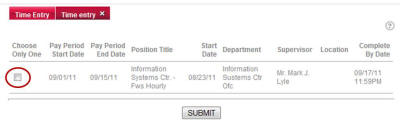
IMPORTANT! Electronic timesheets are issued for a specific position assignment. If you have more than one position assignment, then you'll have a separate timesheet for each position assignment. When recording time worked, you MUST use the appropriate, position-specific timesheet. Time worked for one position assignment SHOULD NOT be recorded on a timesheet for another position assignment. - Click Submit.
- Before entering your time, double-check to make sure that you're using the correct timesheet.
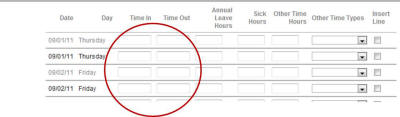
- In the Time In and Time Out fields, shown circled below,
enter the "time in" and "time out" for the appropriate date/day. (For
example, if you worked a two-hour period from 8:00 to 10:00 a.m.,
then enter 08:00AM in the Time In field and 10:00AM in the Time Out
field.)
Note: If you need to enter additional time in and time out times for a specific day, then select the checkbox in the Insert Line column and then click Submit. The timesheet will reappear with the additional line inserted. - When you're finished entering your time worked, click
Submit.
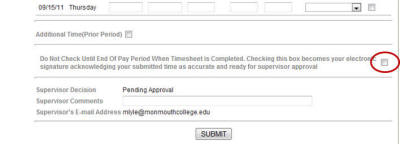
IMPORTANT! To avoid forgetting to enter time worked or to be locked out at the end of the pay period, you're strongly encouraged to enter time on the same day that it is worked. - When you're finished entering your time worked for the ENTIRE pay
period, check the box near the bottom of the appropriate timesheet that
says, "Do Not Check Until End of Pay Period When Timesheet is
Completed. Checking this box becomes your electronic signature acknowledging
your submitted time is accurate and ready for supervisor approval." This box
is shown circled below.
IMPORTANT! DO NOT check this box until the end of the pay period when your timesheet is fully completed and ready for supervisor approval. If you prematurely check this box, you'll no longer have access to your timesheet and will need to contact your supervisor or the Personnel Office (x2122).
- Click Submit. Your timesheet is now
available to your immediate supervisor for his or her approval.
IMPORTANT! Submission deadlines: Final submission of your timesheet(s) must be completed by no later than two days following the end of a pay period. For the semi-monthly pay period ending on the 15th of the calendar month, time entry must be completed on or before the 17th of the month. For the semi-monthly pay period ending the last day of the month, time entry must be completed by the 2nd of the following calendar month. Upon lapse of these deadlines, students will be locked out and will no longer be able to make entries on the timesheet for the corresponding payroll. - When you're finished using the MyMC page, close the browser
window.
IMPORTANT! If you're using a lab computer, then be sure to log off of the computer when you're finished using it so that no one can access your MyMC page.