Home - Information Services - Get Help - How-to-Guides - WebAdvisor - Waitlist Processing for Faculty
Waitlist Processing for Faculty
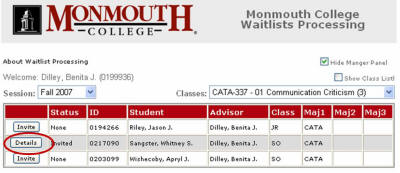
OverviewView a Waitlist for a Class
Invite a Student to Join a Class
View Invitation Details
The Waitlist Processing program enables you to view waitlists for your classes and to invite a waitlisted student to join a class.
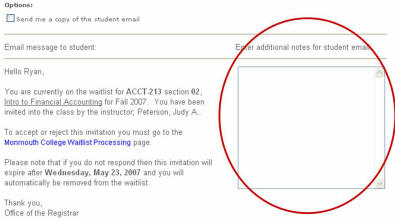
When you invite a student to join a class, an email is sent to the student's Monmouth College email account and to his or her home/alternate email account (if one has been specified). An email is also sent to the student's advisor and to the Registrar's office.
After the student receives the email, he or she must log into the Waitlist Processing program and accept or decline your invitation by a specified date or the invitation will expire and the student will be removed from the waitlist.
If the student accepts the invitation, then an email will be sent to you, the student's advisor, and the Registrar's office. The Registrar's office also will be prompted to register the student for the class.
Note: If accepting the invitation causes the student's course credits to rise to 4.25 or 4.50, then the student's advisor must approve the invitation. (When the student accepts the invitation, the student's advisor will receive an email that prompts him or her to log in to the Waitlist Processing program and approve or deny the invitation. If the advisor approves the invitation, then an email will be sent to the student and the Registrar's office. The Registrar's office also will be prompted to register the student for the class, which could take up to 3 business days.) If accepting the invitation causes the student's course credits to rise to 5.0 or above, then the student must obtain the approval of the Admissions and Academic Status Committee.
If the student declines the invitation, then an email will be sent to you and the Registrar's office (not to the advisor).
- Go to the MC home page (http://www.monmouthcollege.edu).
- Select MyMC.
- If prompted, then log in to the Forefront Threat
Management Gateway page with your MC user name and password.
Otherwise, proceed to the next step.

- Under Campus Links, select Faculty Resources.

- Select Waitlist Management.
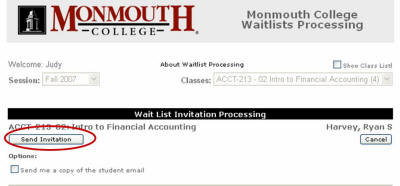
- Click the Session down arrow and select the desired session.
- Click the Classes down arrow and select the desired class.
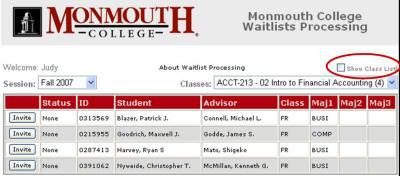
- If you want to see a list of students who are currently
registered for the class, then select the Show Class List
checkbox.
- When you're finished using the MyMC page, close the browser
window.
IMPORTANT! Before leaving your office computer, either lock it by pressing the Ctrl + Alt + Delete keys at the same time and then selecting Lock this computer or log off so that no one can access your MyMC page.
Invite a Student to Join a Class
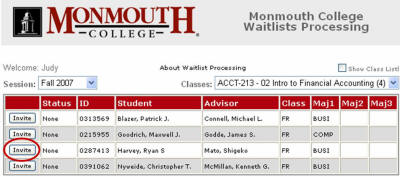
- Click the student's Invite button.
-
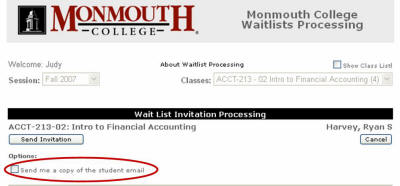
If you want to receive a copy of the email that will be sent
to the student, then select the Send me a copy of the student
email checkbox.
-
If you want to add additional text to the email, then enter it
in the Enter additional notes for student email
text box.
- Click the Send Invitation button. Emails are sent
to the student, the student's advisor, and the Registrar's
office.
After you send an invitation, you can view its details, such as the date the invitation was sent and the expiration date, by clicking the Details button.