Home - Information Services - Get Help - How-to-Guides - Moodle - Moodle for Faculty - Activities - Turnitin Assignment Activity - Create a Turnitin Assignment
Create a Turnitin Assignment
- On the course home page, click Turn editing on.

- In the desired section, click Add an activity or resource.

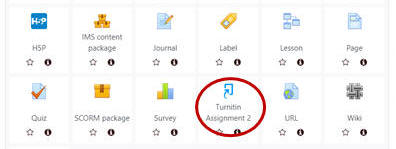
- Under ACTIVITIES, select Turnitin Assignment
2.
- Under General, in the Turnitin Assignment
Name field, enter a name for
the assignment. (This name will appear on the course home page.)
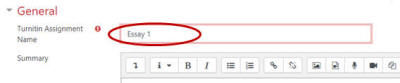
- In the Summary field, enter a description of the assignment and/or instructions. (Students will see this information when they open the assignment.)
- Configure remaining settings under General as desired.
- Submission type - By default, this setting is set to Any Submission Type, which means that students either can upload files or copy and paste their work directly in Moodle. If you want students only to be able to upload files, the choose File Upload. If you want students only to be able to copy and paste their work directly in Moodle, then select Text Submission.
- Number of Parts - A single Turnitin assignment can consist of multiple files. (For example, students can upload multiple drafts for an assignment, and each draft can be graded separately.) This setting determines the number of files that a student can upload and defaults to 1. (When you enter a value greater than 1, a section is created for each part that has its own name, start date, due date, and grade.)
- Maximum File Size - This field defaults to the maximum file size permitted for file uploads, which is 100 MB.
- Allow submission of any file type? - This setting determines the type of file that students can submit for the assignment. This setting defaults to No, which means that students can only submit files that contain text. When this setting is set to Yes, students can submit any type of file, including picture files. (Turnitin can only produce originality reports for files that contain text, so it's recommended that you leave this setting set to No.)
- Display Similarity Reports to Students - This setting determines whether students can view their similarity reports in Moodle, and it defaults to No. If you want students to be able to view their originality reports, then change this setting to Yes.
- Grade Display - By default, this setting defaults to Show grades as Fraction. If you want grades to display as percentage, then select Show grades as Percentage.
- Auto Refresh Grades Scores - This setting determines how Turnitin data is refreshed in Moodle (either automatically or manually). It's recommended that you leave this setting set to Yes.
- Under Grade, configure the settings as desired.
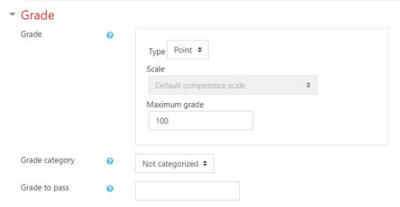
- Type - This setting is used to specify the grade type for the assignment (e.g. point, none, or scale).
- Scale - If you selected Scale as the grade type, then this setting is used to specify the desired scale. (For more information, see Scales.)
- Maximum grade - This setting is used to specify the maximum number of points for the assignment. (The maximum point value that can be selected here is 100.)
- Grade category - If you've set up categories in the gradebook, then this setting is used to specify the category to which you want to assign the assignment.
- Grade to pass - This setting is used to color-code grades in the gradebook. Grades that meet or exceed the specified Grade to pass value will appear in green, and grades below the specified value will appear in red.
- Under Assignment Part 1, configure
the settings as desired.
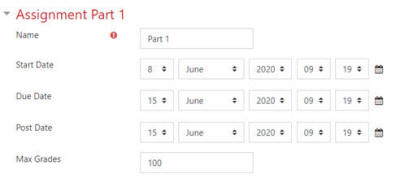
- Name - This setting default to Part 1. If you're creating a multi-part assignment, then this name appears on a tab within the main assignment.
- Start Date - This setting determines when students can access the assignment and begin submitting their work.
- Due Date - This setting determines when the assignment is due. Students cannot submit work once the due date and time has passed.
- Post Date - This setting determines when students can view their grades and feedback.
- If the assignment has mutliple parts, then confiure the settings for each part as desired.
- Under Similarity Reports Options, configure the
settings as desired.
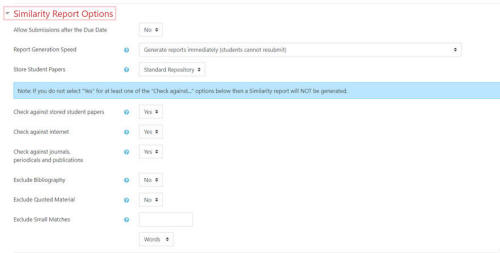
-
Allow Submissions after the Due Date - This setting defaults to No. If you change it to yes, then only students who have not submitted at all can submit late.
-
Report Generation Speed - This setting defaults to Generate reports immediately (students cannot resubmit). If you select Generate reports immediately (students can resubmit until due date), then, after 3 submissions, the report will generate after 24 hours. If you select Generate reports on due date (students can resubmit until due date), then students will not receive a report until the due date has passed.
-
Store Student Papers - This setting defaults to Standard Repository, which means student work is stored in Turnitin’s student paper repository. If you select No repository, then student work is not stored, and if two students submit the same paper, no matches will be found.)
-
Check against stored student papers - This setting determines whether student work will checked against content in the Turnitin repository. If you don't want student work to be checked, then change this setting to No.
-
Check against internet - This setting determines whether student work will checked against content in the Turnitin repository. If you don't want student work to be checked, then change this setting to No.
-
Check against journals, periodicals, and publications - This setting determines whether student work will checked against content in the Turnitin repository. If you don't want student work to be checked, then change this setting to No.
-
Exclude Bibliography - This setting determines whether content appearing in the References, Works Cited, or Bibliography sections will be checked. If you don't this content to be checked, then change this setting to Yes.
-
Exclude Quoted Material - This setting determines whether content appearing between quotation marks will be checked against content in the Turnitin repository. If you don't want content to be checked, then change this setting to Yes.
-
Exclude Small Matches - This setting enables you to exclude matches that are less than a certain number of words or a certain percentage of words.
- Under GradeMark Options, configure the settings
as desired.
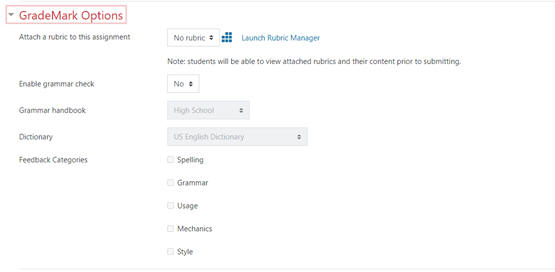
-
Attach a rubric to the assignment - If you want to use a rubric for the assignment, then you'll first need to create it in Feedback Studio by clicking Launch Rubric Manager. (Rubrics added in Moodle won’t appear in Feedback Studio.). To attach a rubric after you've created it, click the Attach a rubric to the assignment drop-down menu and select it.
-
Enable grammar check - This setting determines whether student work will be checked for grammar, usage, mechanics, style and spelling errors. If you'd like student work to be checked, then change this setting to Yes. (When you change this setting to Yes, the ETSD Handbook, e-rater Dictionary, and e-rater Categories options will become enabled.)
-
Grammar handbook - This setting determines whether students can access the ETSD handbook, which provides information on the grammatical errors found in their work.
-
Dictionary - This setting defaults to US English Dictionary.
-
Feedback Categories - Select what you want checked: Spelling, Grammar, Usage, Mechanics, and/or Style.
- Under Common module
settings, configure the settings as desired.
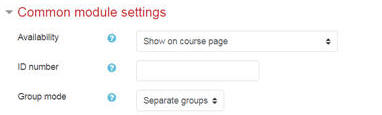
- Availability - This setting determines whether students can see the assignment on your course home page. (If you don't want the assignment to appear on the course home page, change this setting to Hide from students.)
- ID number - This setting is used to specify an ID number for the assignment. (Unless you're using an advanced grading calculation, you do not need to specify an ID number for the assignment.)
- Group mode - This setting is used to specify the group mode for the assignment (visible groups or separate groups).
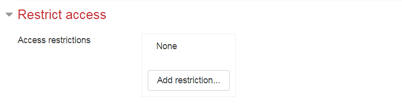
- If you want to restrict access to the assignment, then, under
Restrict access, click Add restriction
and select the desired option.
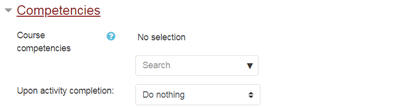
- If you want to link the assignment to a competency, then, under
Competencies, configure the settings as desired.
- Click Save and return to course.